Here's the front cover of a mini album I made recently using KAISERCRAFT Check -In papers etc.The step by step instructions are as follows.
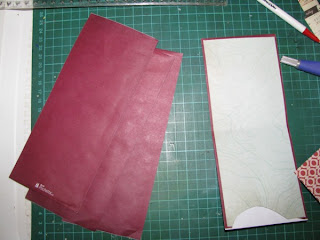
1. First take 4 long paper bags.
You can use square but the finished album will be a different shape.
Mine were found in a motel bathroom (if you get my drift).Because the were maroon and quite thick I thought they might come in handy. They have.
2.Cover each side of all bags with patterned paper, vary to make it more colourful.Leave a tiny border around each, it looks nicer.
3.I've cut thumb grip holes in mine for easy sliding in & out of tags. I've found this works better.
You only need to do this on one side of the open end
Don't decorate the pages yet!
4.Next, fold each bag in half. Make sure that the one which will become the front cover has the opening on the right. Check they are all even.
5.Alternate openings right left, right left(Keep going if you have more pages.)
The one on the left is my cover, but tag thumb grip is on down side. The same with the 3rd one.
6.Lay one inside the other to form a "book".
You should have 2 pockets in the first half of the book, and 2 in the second half.
7.Now before assembling, but making sure the folds are obvious, decorate your pages.
Don't go right to the centre edge or fold line. This will be sewn eventually.
Here is my centre page.
You can see I've cut the photo slightly away from the fold line and the same with the rhinestones etc.
8.WHEN YOU HAVE DECORATED FRONT AND BACK OF ALL PAGES ,THEN STITCH THE FOLD.
Ensure your pages are the right way up.(This is why I waited to decorate my pages!)
I used twine and a darning needle and used a hole poker to pre-drill the holes before sewing.
You could try your sewing machine if it copes with heavy duty thicknesses, but these bags were too stiff.
9.Bring your ends through to the outside of the album and tie off. Leave ends long if you wish.
This could also be done with ribbon or wool if you wish.
10.Making 4 Tags.
11.Cover both sides with patterned paper.
12.Check which way they will be inserted into your pockets THEN add photos and labels
( but you could use them for journaling or inspirational words or die cuts)
13 Pierce a hole in each tag and add twine or wool or decorative braid or lace or ribbon.
These can be varied if you want it more colourful too.
14 Insert into album pockets and you are finished!!!!
Good Luck and if you want to leave a link in my comments section, I'd love to see your mini albums.


4 comments:
Looks fabulous Julene, now to find some long skinny paper bags !
Mary
LOL - what a great use of bathroom bags!!! Fab mini TFS
Oooo, I'm feeling inspired. Looks great. Nice to see London featured. Great way to capture this special place.
What a wonderful travel album! Super job on this!
Post a Comment