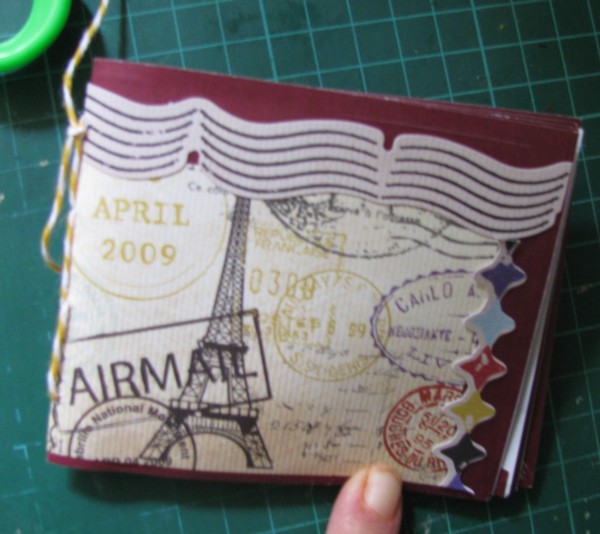
Here's the front cover of a mini album I made recently using KAISERCRAFT Check -In papers etc.The step by step instructions are as follows.
1. First take 4 long paper bags.
You can use square but the finished album will be a different shape.
Mine were found in a motel bathroom (if you get my drift).Because the were maroon and quite thick I thought they might come in handy. They have.
2.Cover each side of all bags with patterned paper, vary to make it more colourful.Leave a tiny border around each, it looks nicer.
3.I've cut thumb grip holes in mine for easy sliding in & out of tags. I've found this works better.
You only need to do this on one side of the open end
Don't decorate the pages yet!
4.Next, fold each bag in half. Make sure that the one which will become the front cover has the opening on the right. Check they are all even.
5.Alternate openings right left, right left(Keep going if you have more pages.)
The one on the left is my cover, but tag thumb grip is on down side. The same with the 3rd one.
6.Lay one inside the other to form a "book".
You should have 2 pockets in the first half of the book, and 2 in the second half.
7.Now before assembling, but making sure the folds are obvious, decorate your pages.
Don't go right to the centre edge or fold line. This will be sewn eventually.
Here is my centre page.
You can see I've cut the photo slightly away from the fold line and the same with the rhinestones etc.
8.WHEN YOU HAVE DECORATED FRONT AND BACK OF ALL PAGES ,THEN STITCH THE FOLD.
Ensure your pages are the right way up.(This is why I waited to decorate my pages!)
I used twine and a darning needle and used a hole poker to pre-drill the holes before sewing.
You could try your sewing machine if it copes with heavy duty thicknesses, but these bags were too stiff.
9.Bring your ends through to the outside of the album and tie off. Leave ends long if you wish.
This could also be done with ribbon or wool if you wish.
10.Making 4 Tags.
11.Cover both sides with patterned paper.
12.Check which way they will be inserted into your pockets THEN add photos and labels
( but you could use them for journaling or inspirational words or die cuts)
13 Pierce a hole in each tag and add twine or wool or decorative braid or lace or ribbon.
These can be varied if you want it more colourful too.
14 Insert into album pockets and you are finished!!!!
Good Luck and if you want to leave a link in my comments section, I'd love to see your mini albums.
Wednesday, 24 April 2013
Monday, 22 April 2013
Stuck?! April's 2nd sketch
Here is the 2nd sketch for April

and my interpretation of it.
The original colour photo was quite yellow but it hasn't come up too badly in black & white. My daughter used to love sitting on my lap and hearing stories or having conversations about imaginary things. She was full of wonder about life, fairies and all things magical.
I've used Kaisercraft Airy Fairy range "Whimsical" as it suits this situation. I had fun layering and adding buttons and brads.The lace is about 60 years old.

and my interpretation of it.
The original colour photo was quite yellow but it hasn't come up too badly in black & white. My daughter used to love sitting on my lap and hearing stories or having conversations about imaginary things. She was full of wonder about life, fairies and all things magical.
I've used Kaisercraft Airy Fairy range "Whimsical" as it suits this situation. I had fun layering and adding buttons and brads.The lace is about 60 years old.
Sunday, 21 April 2013
Shabby tea room.
I've made this card for the shabby tea room
http://theshabbytearoom.blogspot.com.au/
The inspiration picture featured a ladder with turquoise vases and a sprig of pink flowers.
I've gone with those 3 colours in a card. I used cut up crochet doileys ,dyed to a very soft turquoise tone,then added pink brads centres. The background paper features numbers. I always count as I go up a ladder. It is a hangover from childhood I guess!
http://theshabbytearoom.blogspot.com.au/
The inspiration picture featured a ladder with turquoise vases and a sprig of pink flowers.
I've gone with those 3 colours in a card. I used cut up crochet doileys ,dyed to a very soft turquoise tone,then added pink brads centres. The background paper features numbers. I always count as I go up a ladder. It is a hangover from childhood I guess!
Saturday, 20 April 2013
Unscripted Sketches #169
And here's my slight twist on it.
If the lady with the umbrella replaces the square on the left, it is the same as the sketch. Hope you like it!
Stuck on U card sketches
If you are one of my blog followers and wondering why there is so many posts ,it is because I'm confined to the house for a few days. My doctor has told me to "rest up" and me being me, needs to do something so I'm crafting.
Here's the card sketch at Stuck on u.
And here's my interpretation.
Here's the card sketch at Stuck on u.

And here's my interpretation.
The inner outlines are silver, not black. This matches the background card which is also silver.
I thought this would make a nice wedding anniversary card.
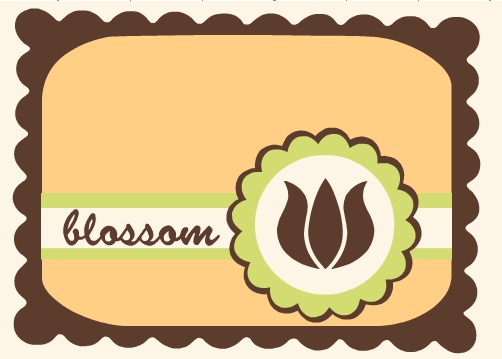
The word blossom on the sketch I took to mean the card needed a flower so I have complied.
I don't have a machine that cuts scallop edges, so I've fussy cut around a journaling block from Kaisercraft here.
Stuck on u sketches using Counterfeit kit.
Here is the sketch for Stuck on u sketches

As you can see,it is a double.
Here's my interpretation.

As you can see,it is a double.
Here's my interpretation.
I made a stupid mistake when doing this double. I thought I had 2 sheets of the check paper when it turned out to be one plus a part of one. So I've used pastel spots on the second. I can justify it in a way because our Physical culture uniforms had spotted collars.
Anyway despite this the 2 pages match.
The photos are dark because they were taken as slides back in 1959 and I've only recently had them made into prints.
Here are the pages separately so you can see the details better
I've used kaisercraft Tiger Lilly butterflies and flourishes as well as pearl flourishes in white.
The majority of what is on these layouts is from my counterfeit kit.
Friday, 19 April 2013
Case this sketch #24
This weeks case this sketch looks like this

I chose to put my robots straight on to cardstock this time and they still dominate the card. I have followed the sketch. They're from Kaisercraft's Technologic.

I chose to put my robots straight on to cardstock this time and they still dominate the card. I have followed the sketch. They're from Kaisercraft's Technologic.
Subscribe to:
Posts (Atom)